Friday, October 31, 2014

Ghostly Meringues

Happy Halloween!! 

I love this holiday! Everyone acts a little sillier and a but more strange.... kinda like me. Our house is decorated with tombstones on the grass, scarecrows in the planters, pumpkins everywhere, spiders all over the fireplace, and ravens lining the front gate. With toddlers I found I cannot make it too scary. I took Caroline into one of those Halloween stores and I am pretty sure it provided her with enough terror to last her a few years. She was screaming. I lost a mommy point that day. But, my youngest absolutely loved it! She wanted to be scared over and over and would just laugh. She particularly liked the zombie children pop up toys... freaky!!!!

Anyways, Halloween is here. Last night we carved pumpkins and made special ghostly treats. 


The most favorite dessert I make is a pavlova. It is perfectly sweet and has just about all the main food groups: eggs, cream and fruit. It is a meal in itself. I have had this recipe for years now. It had taken me many tries to perfect it. So rather than make you go through all the agony, I have condensed the recipe to give you a simple meringue (though the only difference between this and my pavlova is the cream and berries that would go on top.) 

What you need:
3 egg whites, room temperature
1 cup superfine sugar (if you do not have superfine sugar don't worry, use regular sugar)
1/2 teaspoon vanilla
1/2 teaspoon white wine vinegar (not the egg dying kinda vinegar... pay attention!)


Directions:
Preheat oven to 350 degrees.

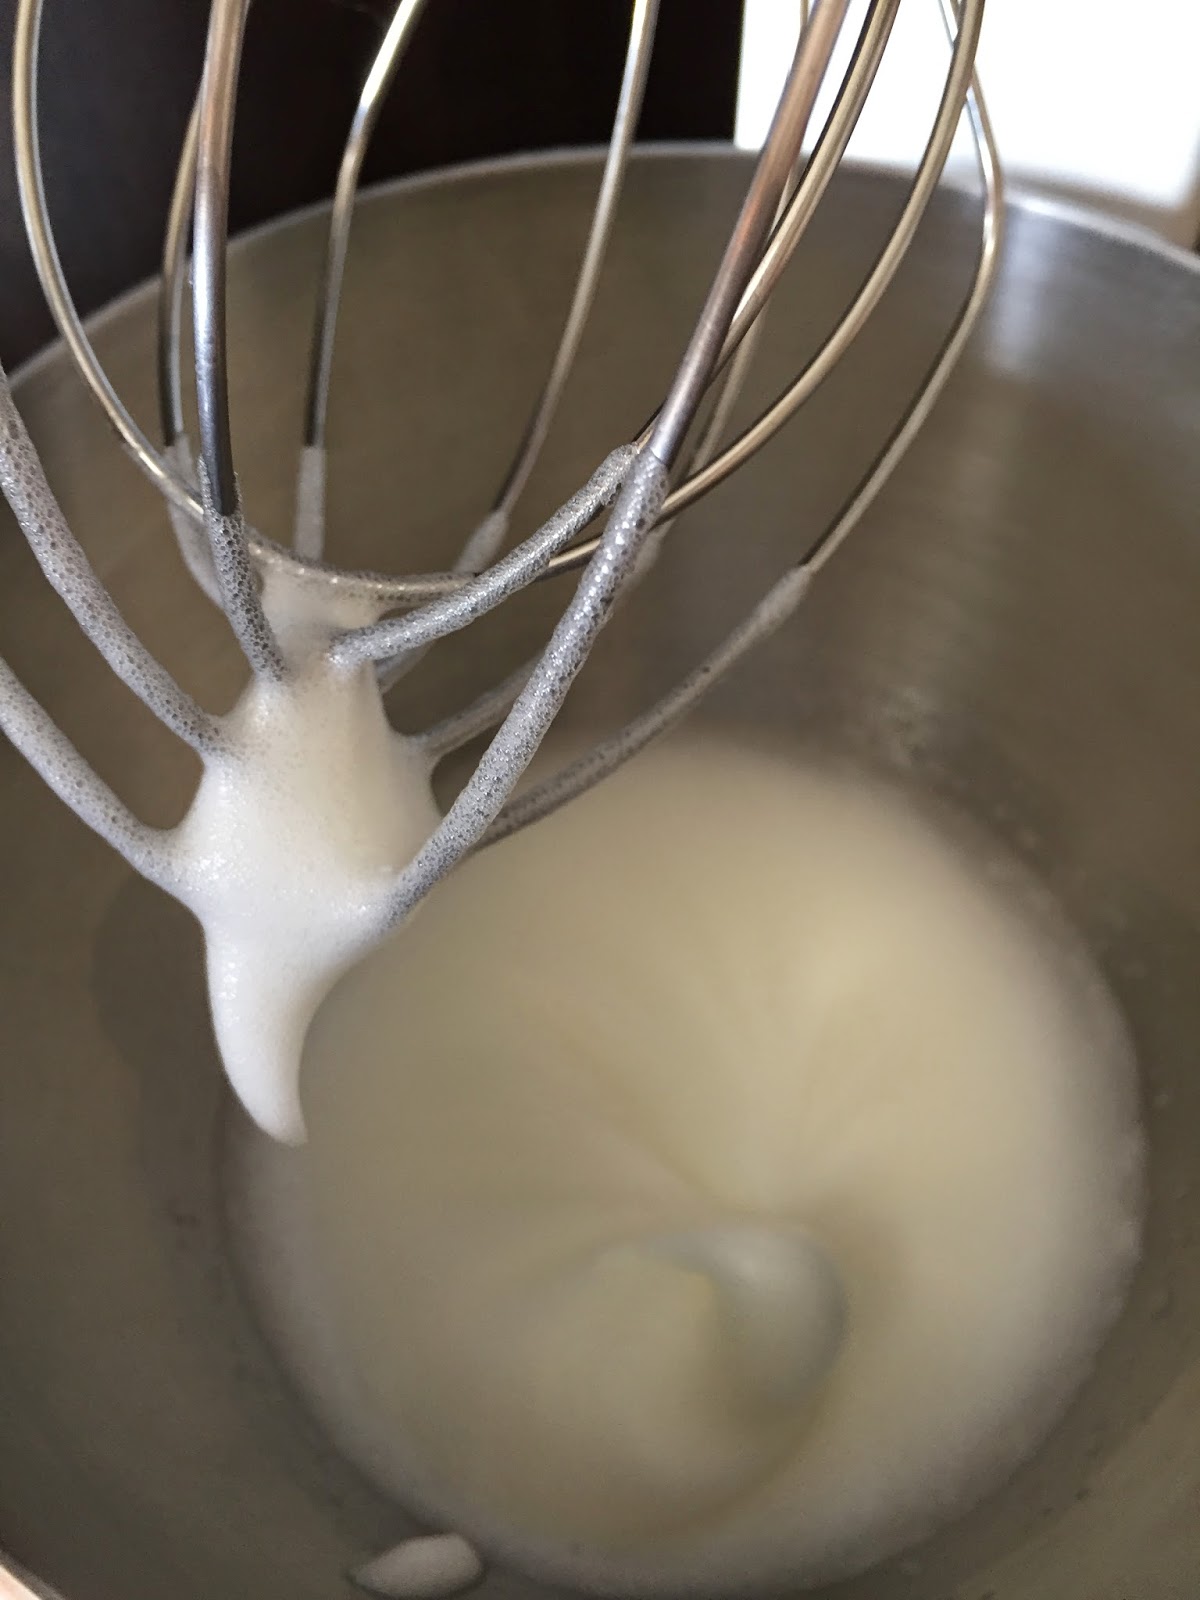
Beat the egg whites until satiny peaks form.


Then beat in the sugar a tablespoon at a time until the meringue is stiff and shiny. 


My "professional" advice here is to pay very close attention to your egg whites. If they are over beaten they will be stiff and yucky. Get your kiddos set up with a snack and a favorite show at this point so you can have 10 minutes to yourself for this!

Turn off the mixer and add the vanilla and white wine vinegar. Use a spatula to fold it all in (folding in is almost the same as mixing but you do it slowly and more carefully.)

Prepare a pastry bag with a big open tip (or just cut a hole in the corner of a plastic bag.) Fill it with the meringue (I find that if you put the bag into a tall cup and fold over the sides you can easily fill up your bag without making a horrible mess.)

To make the ghostly meringues just pipe out the meringue in circles one on top of the other; getting smaller as you build up. I used a smaller tip and created something more like mummy ghosts but, no worries, the kids get the idea and I look even more creative!! The point is just use your own creative discretion and I know they will be great. I even made a few that were flat.


Place them into the oven and immediately turn the temperature down to 300 degrees. Bake for 30 minutes. Then turn off the heat and leave them in the oven for another 30 minutes. Remove from oven and allow to cool completely before adding faces to your ghosts.

I then adorned my ghosts with some candy eyes and raisins for a mouth. I used store bought frosting to stick them on.


Its a ghostly parade!!


Ahhhhhhh!!!!


Wednesday, October 22, 2014

Ear Wax


Halloween is a perfect time to create food that makes you gag a little bit. This idea fits the bill! Next time your kiddo needs a snack just grab a Q-Tip and some ear wax and you are good to go. Note my child's reaction when I offered her some ear wax. Priceless! And the 2 year old completely hesitated before I encouraged her to eat it. The best thing about this snack is how utterly, completely easy it is. It would make a great treat for a Halloween party or playdate! Don't miss the fun Food Play craft included below!


What you Need:

Q Tips
Handful of mini marshmallows
1 TBS Nut Butter (we used peanut butter)


Directions:


Cut off one of the cotton ends of the Q Tip. Push the cut end into a mini marshmallow.


Dip the top of the marshmallow into the nut butter. I swirled it to get a nice effect!


Arrange the ear wax on a tray and serve.


Food Play Craft:  

X-Ray Hand

Put those Q Tips to work again and make a fun X Ray of your kiddos hand (of foot!) All you need is black paint, paper, Q Tips, and glue.


Swab some black paint all over your kiddos hand and make a handprint.


Dab some glue onto the cotton ends of the Qtip and fix to your dry handprint. 


Look how proud she is of her X ray!


Thursday, October 16, 2014

'Spook'tacular Treats


Halloween is a fun time of year for creatively spooky food! There are lots of great ideas in magazines, pinterest boards and Facebook on how to turn food into mummies, bats, ghosts, skeletons, witches, and spiders. I have said this before but what is it about Halloween that gets people inspired to be creative with their food?! You don't need a holiday to be silly at the dinner table. Kids love the creativity all year round! But I am happy to know that this little idea of mine for making creative food has a niche somewhere. 

By now I will assume that you have your house decorated with pumpkins, spiders and ghosts; candy corns have made their way into your treat rotation; the kids have their costumes all picked out too (if you have a little girl is it safe to say that she will be dressing up as Elsa this year?); and you have indulged in your fair share of some pumpkiny Fall beer (maybe that last one is all me!) 

To help get us all get into the witchy spirit I have compiled some past recipes that have a spooktacular theme. I also have some new ideas that I will be adding in the next 2 weeks. 


I Want My Mummy

You can make this one easier for you by wrapping slices of the dough around a hot dog and then baking.


Dragon Eggs


Trick or Treat: Bones


Trick or Treat: Eyeballs

Wednesday, September 24, 2014

Rainbows and Unicorns

Every morning I ask my 4 year old what she dreamed about while she was sleeping. Without fail she always says "Rainbows and Unicorns!" Ah, to be 4! Childhood is the most magical time in life. It is full of such innocence and joy that you believe anything is possible. My own childhood was filled with endless possibilities and rich imagination.

It is one of my greatest hopes that my children have the most magical childhood possible. To me, it is important that during these few short years I can foster in them a rich imagination and the ability to see all the wonder there is in life. This is the reason that I am as silly, creative and imaginative with my kids (and everybody else's kids for that matter) as I can possibly be.

Extending this type of play and imagination to their meals just seems natural.

To celebrate all those 'rainbow and unicorn' dreams I found a way to make a key toddler staple more fun and colorful! Using farfalle (Italian for butterfly) noodles adds a further dimension to the whimsy of the dish. 

Rainbows, Unicorns, Butterflies...oh my!

(unicorns not included.)


What You Need:

  • Box of noodles (farfalle are great but spaghetti is just as good... think colorful snakes!)
  • Various Food Coloring 


Directions:

Bring a pot of water to a boil. Add about 30 drops of food coloring to the water (the more food coloring the brighter the color so use your own discretion here.)

Add in the pasta and cook as directed. 

I added some melted buttered and a little bit of parmesan cheese to make it tasty. 
It's as simple as that!


I cooked several colors to make a rainbow effect. 

I had my littlest one scoop out the colors she wanted. She loved all the bright colors.
The pink was the favorite (of course) but when I called the teal color 'Elsa Blue' there was no going back. If I were having a Frozen party this would be a perfect treat, just saying.

.


Enjoy!


P.s I was having visions of this for Halloween by using orange and black food coloring and farfalle noodles. They would look like bats! I gotta go find me some black food coloring and try it out!!

Wednesday, August 13, 2014

Fruit Wigglers


There are a lot of fun jello ideas out there. This one is by far my favorite. It looks like fruit but it is all Jello.


Hollow out a lemon, orange, melon or even strawberries!


Make your Jello as directed on the box.  I used the lemon flavor to correspond with the lemons. 


Pour your Jello into the hollowed out fruit.


Allow the Jello to set up in the refrigerator for several hours.


Once the Jello is set up use a serrated knife and slice your Fruit Wigglers.


Served with a smile!


Friday, August 8, 2014

Brownie Pizza


Brownies are just about the perfect food. Right there next to pizza which IS the perfect food. Am I right or am I right? Here is a great idea that combines both. Moreover this Brownie Pizza is almost healthy for you. You will be asking your kiddo if they want another slice before their done with the first one! Here`s my little secret...

What you Need:

Box o`Brownie Mix
Apple Sauce (amount will vary depending on oil needed)
1/2 cup Frozen Spinach, thawed and pureed
Whipped Cream (maybe use whipping cream and make the whipped cream yourself!)
Strawberries, sliced
Blueberries

Directions:

Preheat oven as directed by the Box o`Brownie Mix.


In a large bowl stir together the brownie mix with all ingredients as listed on the Box o`Brownie Mix (substitute the apple sauce for the oil in the recipe) plus the pureed spinach. Seriously, they wont even know the spinach is there!

I then poured half the mix into a spring form pan to create a thin pizza and popped it into the oven. 

You might already be thinking ahead that you can make 2 of these Brownie Pizzas! 
That means an entire one for yourself!


 Once the 'pizza' is completely cooled spread a layer of whipped cream on top. 

Note: I took whipping cream and put it in the mixer to create the whipped cream. There is no added sugar this way which means it is just a little bit better for you. There is enough sweetness in the brownie and fruit to compensate. Just pour the cream in your mixer and mix for several minutes. Once it starts to fluff up keep a close eye on it so you do not over mix it as it will make the whipped cream "stiff."


 Add on the toppings of strawberries and blueberries. 
Even better have your kiddo do the toppings!


For added effect I took last night's pizza box and revamped it for this dessert. Clever, right? 

You might even do this but have your kiddo decorate the pizza box with paints, glitter, jewels, whatever. 


Cut yourself up a nice slice of pie and enjoy!


Friday, August 1, 2014

Little French Men


My life Before Kids (BK) included living in Europe for awhile. It was an exciting and inspiring time for me. It is a distant memory though (kids do that to you!)  But I am looking forward to bringing my girls to all the places in Europe that will excite and inspire them. We are a few years away from this but it hasn`t stopped me from teaching my girls about different countries.

Yesterday we were watching videos of singing gondoliers on the Venice canals. I loved watching Caroline`s eyes dazzle as she imagined a city with no streets or cars, just waterways and boats. She listened to the Italian songs and asked what the songs were about. It was a rare occasion where my Italian language skills came in useful (I knew those months of living and studying in Italy would come in handy one day!!)

And last week we were looking at pictures of the Eiffel Tower because Daddy was in Paris for `work.` Caroline loves the Fancy Nancy book series so she is familiar with Paris and the Eiffel Tower (if you don`t know FN she is a little girl that loves all things French.)  Now, she cannot wait to go to Paris like Daddy and take her picture in front of the Eiffel Tower too. I showed her what the French flag looked like and even got out my souvenir from a past Paris visit.

I decided to use this inspiration to make a new creation. So, to celebrate daddy`s return we made Little French Men.

WHAT YOU NEED:

GINGERBREAD MAN COOKIE CUTTER
BREAD
2 EGGS
2 TBS MILK
1/8 TSP VANILLA EXTRACT
1/2 TSP CINNAMON SUGAR
2 TBS BUTTER
CANDY EYES 
RAISINS


DIRECTIONS:

Using a cookie cutter cut out your little men. I used regular wheat bread, nothing fancy. 


Mix the eggs, milk, vanilla, and cinnamon sugar together in a bowl. Give your little men a yolky bath by letting them soak in the mixture for one or two minutes.


Add your butter to a skillet on medium heat. Once melted put your men into the hot pan. Cook for about 2 minutes on each side.


Add on the eyes and cut a raisin to make a smile and voila! Très facile!