Monday, September 30, 2013

Waffle Eggs


If you are like me then you got that much needed waffle maker as a wedding gift and it has been sitting at the back of your cupboard ever since. You probably had big dreams of eating waffles every Sunday with your betrothed. But after the 'I Dos' and a kid or two later you have settled for those frozen disks as a poor substitute to the warm, fluffy yumminess of fresh waffles. Reality is there is something daunting about that waffle maker; like using it is some huge committment that requires thought and energy that you just dont have to give. Or maybe it is the waffle itself that holds us back. I decided that it was time to give that waffle maker its day in the sun.
I recently came across a recipe that used the waffle maker to cook cornbread. Clever, I thought. If cornbread can be used then cookie dough, cake mix and cinnamon rolls were possible as well. And then inspiration struck...EGGS.  My daughter already eats her eggs with syrup and she loves waffles. It was perfect. They cook up so fast and interestingly enough the eggs tasted superb.
Break out that waffle maker and give it a try!
What you need:
  • Waffle maker
  • Cooking spray
  • 4 eggs
  • salt and pepper
Directions:
Wipe away the dust from the top of the waffle maker. Then turn it on. While it is heating up scramble the eggs in a bowl adding salt and pepper.
Once the waffle maker is heated up spray it generously with cooking spray.
Slowly pour the egg mixture onto the waffle maker. It takes about one egg per waffle square, so measure it out accordingly.

this is using 2 large eggs.
Close the lid for about 30 seconds and finish the cooking. It really doesn't take very long so keep an eye on it.


Getting it out is a little tricky. Just go slowly and keep it as intact as possible.


 I drizzled some syrup on it for my little one and she ate this up. It was very tasty!

Tuesday, September 17, 2013

Painted Bread


Art is everywhere... even on your bread. That fluffy square of yeasty goodness is now your little ones canvas. With some "paint" and a healthy imagination they can color it any way they choose. I like to think of it as 'Bread Expressionism.' This is the perfect idea to make toast more interesting or a boring sandwich super fun!


 What you need:

  • white bread
  • milk
  • food coloring
  • paint brushes


Directions:

Fill 4 cups with 1/4 cup of milk each. Then add 5 drops of a different food coloring to each cup. Now you have your 'paint.'


With a paint brush in hand have your kiddo 'paint' their bread. As an aside, if too much of the 'paint' is used the bread will get a bit soggy.


There are plenty of things you can now do with your new paintings:

Toast with colored scrambled eggs or a colorful sandwich. Maybe even wall art for the day.


beyond green eggs and ham
 
awesome sandwich
Wall art!

Friday, September 13, 2013

P is for Pancake

At some point during our own socialization process we are indoctrinated to believe that pancakes have to be round. So what I am about to tell you is going to blow your mind. Are you ready for it? Pancakes DO NOT have to be round.  They can be shaped like a square or triangle, a star or a swirl, or better yet the ABCs. You can spell out your kiddos name, say 'thanks, ' 'I love you' or even better 'Happy Birthday.' The possibilities are endless here.
 
 
What you need:
  • pancake mix (yes, you can make your pancakes from scratch but I am all about simple here)
  • butter
  • plastic bag
  • scissors
  • syrup
 
Directions:
 
Prepare the mix as directed on the box or based on great grandma's special secret family recipe.
Try not to make the mix too runny because it just makes a big mess.
 
Heat up your skillet on medium heat and add a tablespoon or 2 of butter.
 
Meanwhile, fill a plastic bag with the mix. And then snip off a small piece of the corner of the bag.
 
Now you can easily spell out your letters. Make sure that each of the lines in the letter are thick enough or they can easily break when you flip them over.


Have them cook until you see little bubbles forming on the top, usually about 2 minutes. Flip them over and cook the other side for a minute. 

 
Breakfast and a lesson on the ABCs are served. Drizzle with syrup and enjoy!
 
My daughter decided that her favorite letter is 'C' which is perfect as her name starts with 'C.'


FOOD PLAY:   

Learning Your Letters

Kids all learn at different rates. Some are barely 3 and know all of their letters, how to play a piano and are star tennis players. Most kids are still grappling with the idea of the ABCs and are just happy to sing the song. Kids will learn what they learn when they are ready to learn it. Until then let's just have fun with our kiddos. Here is a fun matching game using letters.
 
My kiddo is still learning what the letters look like so I just used capital letters listed on a sheet of paper and then the same capital letters on little cut outs. If your child is older think about using capitals on one sheet and lower case letters on another.
 
If I had time and laminating paper I would have laminated these to ensure longevity. For now I put them in a large ziploc bag and bring it out at restaurants to keep my child entertained. Even if it is for 2 minutes that is 2 minutes of peaceful dining...just kidding, why the heck would I choose to go to a retaurant with a 1 and 3 year old!? That is just insanity!


Here is a swirly pancake just for fun!


Tuesday, September 10, 2013

Apple Smiles!


My daughter started preschool this year. I had visions that she would be the well adjusted child that took charge of the class while displaying her keen building block skills and mastery of the paint brush. Instead, she proved that she has serious mommy issues and cannot stand to be away from me for even a minute. This, of course, made me feel awesome that my child loves me so much...for like a minute. Afterwards I needed to find ways to bring a smile to her sweet face. Make a smile to get a smile is my motto. Here is what I did.

What you need: 


  • apple
  • peanut butter
  • mini marshmallows


Directions:

Core your apple and cut into slices.

Spread 2 apple slices with a teaspoon of peanut butter.

Line up your apple slices and prepare for the implants.

Here is ol' Bucky on his way to becoming a full set of pearly whites.

A toothy grin is coming into focus now.


And without a dentist in sight here you have a perfect smile!


FOOD PLAY:  TOOTHBRUSH ART 

The perfect art project to go with these Apple Smiles had to include a toothbrush. It is a brush that spends all its time smothered in flouride and never gets to truly express itself. Now is its time to shine!

What You Need:
  • Toothbrush
  • Paint
  • Paper


Using your toothbrush as the paintbrush and brush your canvas!


Be sure not to brush your teeth with the same toothbrush with twhich you brushed your canvas!!


And here you go.. Toothbrush Art!

Monday, September 2, 2013

BACON!

 
It is Sunday morning in the Fall. That means the men in our lives are gearing up for a big day of neglecting the kids, the house and even you to watch football. Many of us have begrudgingly accepted this as just the way it is while secretly wishing we could spend a day based around our own wants and needs. (Ahhh..I am imagining that right now.... no dishes, no meals to prepare, no butts to wipe, no double team crying, no crumbs to sweep up...honestly though, I have no idea at all what I would go and do. Truth be told I would be lost without my babies.)

But back to the man of my life and his wants and needs. Reality is all he wants is bacon. And what better way to send him off with his Sunday NFL ticket then with bacon. So, here is the breakfast of ex-champions for you dear!


 What you need:
  • unbaked cinnamom rolls
  • bacon

Directions:

Cook bacon. I put it in the microwave for ease of cooking and clean up. I line a plate with lots of paper towels then place bacon strips on it and then cover with more paper towels. Then I cook them for a minute per strip. If you want more crunchy bacon add on a minute or two.

And the best advice I can give you is that if you decide to cook the bacon on the stove top never, ever do it naked. You could get serious burns in all the wrong places and totally freak out your children!!

While bacon is cooking remove cinnamon rolls and unroll them. Then, once bacon is cool enough to handle place a strip on top of the unrolled cinnamon roll.


To reach bacon nirvana roll up that cinnamon roll around the bacon strip.


Bake according to cinnamon roll instructions, usually at 350 degrees for 15- 18 minutes.


These delicious baked treats will make him one happy boy! Oh, and Go Patriots!!

Sunday, September 1, 2013

Dragon Eggs


Dragon eggs are not as easy to come by as they used to be (for any of you that watch Game of Thrones you know what I am talking about.) Luckily, you don't have to walk through fire or brimstone to get them anymore. Recent news reports indicate that chickens in the northern region of Scotland have been laying dragon eggs for decades. You just have to get your hands on them. At least that is what you can tell your kiddos. Remember when it comes to kids imagination can be everything!  So the question is, what came first the chicken or the dragon egg?
 
 
What you need:
  • eggs
  • food coloring
  • cups of water


Directions:
 
Place eggs in pot of cold water and bring eggs to a boil. After eggs have boiled for one minute remove them from the heat and cover the pot. Leave them alone for 17 minutes. Then transfer them to an ice bath for 10 minutes.
 
During this time fill cups with water and add in food coloring. The darker the food coloring the better (yellow isnt that dramatic.) I dropped in 25 drops to about 1 1/2 cups of water.


By this time your eggs will be cooled and it is time to begin the transformation to Dragon Eggs.Very gently crack the shell of the egg by tapping it lightly on the counter. Try your best not to crack the egg so hard that the shell peels off (if this happens dont fret, just ease up!)
 
 
Once the shell is cracked gently drop them into the cups of colored water. Place them in the refrigerator over night (the longer they spend in the food coloring the darker they will become.)

The next day you will have hatched amazingly rare Dragon Eggs! Be sure to place them in a nest to really create an effect. The question now becomes what to do with them.


Some ideas:
  • eat the hard boiled egg as is - this is what we did.
  • cut them in half, scoop out the yolk and add in a tiny dragon toy to achieve a full dragon effect (I couldnt find one but I didnt look that hard...sorry.)
  • make deviled dragon eggs out of them. I brought these to a Harry Potter themed party and called them "Hagrid's Dragon Eggs."
  •  
FOOD PLAY ALERT:
 
DRAGON TOES
 
 
These are ferocious little feet that are easy and fun to make!
 
What you need:
  • 2 rectangle sized tissue boxes
  • favorite paint color and paint brush
  • construction paper and scissors
Directions:
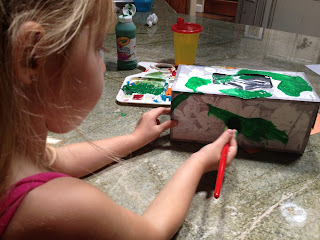
Use all the tissues in the box and then have your kiddo paint the box their favorite dragon color. Use the construction paper to cut out the dragon toenails. If you want to get fancy you can add some glitter to those toes!
 
 
Get those new feet on your tot and have them growl and roar all around the house.


The cutest little dragon ever!