Friday, June 20, 2014

Pancake Bites


Our breakfast routine has become stuck in the toddler doldrums of same-old-same-old. Have any of you noticed how your kids could eat the same thing day after day after day (and watch the same episode of Sophia the First day after day after day!!)?  Our almost 4 year old, Caroline, will only eat the same old things, which includes too many frozen waffles (hockey pucks!) and too much cereal. Chocolate Rice Krispies were mandatory for a few weeks...yes, I give my kids sugary cereal. Don't judge me.

Because of this toddler fetish, I feed Catherine, the almost 2 year old, her "first breakfast" before Caroline because she will only eat what Caroline is eating (waffles and cereal!) I want her to be open to all foods before she is not.  During first breakfast she gets scrambled eggs, oatmeal, or even parfaits ("Parfaits gotta be the most delicious thing on the whole damn planet!"). Afterwards Catherine gets her "second breakfast" with Caroline. Catherine is our Hobbit because she will also want Elevensies, Lunch, Afternoon Tea, Supper, and Dinner.

To break out of these doldrums I am making another effort to bring back the Pancake.  In a previous post I shocked you when I said pancakes do not have to be round. Now, I will blow your mind and say that they do not have to be flat either! The result is a perfect creation of Pancake Bites. They look like muffins but they are all pancake. And sooooooo easy!


What You Need:

  • Pancake Mix (yes, again, you can make your own mix and I am sure it will be awesome but most mornings I don't have that kind of time or energy)
  • Mix ins: Blueberries, Chocolate Chips, Sprinkles, Bacon Bits
  • Mini muffin pan


Directions:

Preheat oven to 375 degrees.

Combine all ingredients in a bowl as instructed on the box (or from a recipe...you go girl!)

Scoop the batter into a greased mini muffin pan. I use a small ice cream scooper to ensure all are the same size.

 
Next, add mix ins to the Pancake Bites. I used what I  had...chocolate chips, raspberries and sprinkles.


Put them in n the oven for 8- 10 minutes. But keep an eye on them as they cook fast.

 
Let them cool and serve them up with a small bowl of syrup for dipping.


They are the perfect size for little fingers. And the best thing was that they ate them all up!

Thursday, June 5, 2014

New Name, Same Fun

Hello!!

I am rebranding my blog.

I just wasn't a fan of the name and wanted something more creative. Luckily for my children I love their names and have not thought of rebranding them at all!

There are big plans in store for all these great recipes. I see cookbooks, TV appearances on the Disney Channel (let's face it, the woman they have on there now is awful... who thinks serving up baked cauliflower to a kid is a good idea?! Who is with me here?), and then my own show on Food Network (where are those cooking for kids shows anyways?!)

Look for some exciting changes coming up in the next weeks. And be sure to sign up to recieve my blog straight to your email. Seriously! When I become crazy famous you can say that you were with me from the beginning.

Gotta get back in the kitchen and start my next crEATion... and wash the pile of sippee cups staring at me right now.

Cheers.
Amy

Saturday, May 31, 2014

Little Boxes

It has been an exciting few months! For the last year we have been trying to sell our house. Last month it finally sold and we moved into a new house. If anyone has ever tried to sell a house with toddlers you can appreciate what an enormous feat it was for me. Constantly keeping the house free of fingerprints on the glass and paint on the walls, not to mention the endless crumbs and dried juice on the floors. That playroom had to be converted back to the dining room (what a waste of perfect play space.) I dreamed of the day when we could live in our own filth. That dream has come! Lucky me.

We Moved!


During the last month there has been one real constant in my life... boxes. They were everywhere! Once I unpacked one 3 more would magically appear. We still have a garage of boxes to unpack yet we have everything we could possibly need. So the question becomes what is in those magically appearing boxes?!  I cannot answer this question but what it did provide me was inspiration for a perfectly fun snack: Little Boxes.


What you need:

  • watermelon (or cantalope or honeydew or all of them)
  • Peaches
  • Bananas
  • Avocado
  • Cheese
  • Bread Loaf
  • basically, anything that happens to be in your fridge that can be cut into squares
this is what I managed to put together

Directions:

This is so simple that I almost dont need to provide instructions. However, I understand some of you may be sleep deprived so here goes... take whatever fruits, cheeses, breads and veggies you have gathered together and begin cutting into square pieces. Most will have rounded edges but dont you worry about that, just make a nice slice down the side to even it out. Voila you have a plate of little boxes!
 
 
Now for the fun part,  have you or your kiddo stack the boxes up into a tower or a house. Think of it as a food jenga! The different colors and textures will add a neat sensory experience too. The slimey watermelon, the sticky avocado, the smooth cheese, the dry bread... get stacking!


If you like my blog please sign up to follow my posts

with email!!!


Wednesday, March 26, 2014

Bird Nest Spaghetti


Happy Spring!


In Arizona it has been Springtime weather since mid October. Though, we did have one fairly chilly day when we needed a sweater. That was a tough day for us! But for most everywhere else the entire winter was brutal. After awhile it was just funny to see the rest of the country digging themselves out of another polar vortex. My Connecticut born husband was especially happy that he didn't have to shovel a driveway!  How do you people with children do it? I have to give you mad props for that!

By the end of May we will welcome an entire summer of over 100 degree days (who will be laughing then?!) When it is that hot outside there is nothing much you can do. There is the play area at the mall, play dates at Target, or watching 'Frozen' for the 800th time in the air conditioned house.  In this kind of heat, the littlest ones will literally melt; the older toddlers will lay in a puddle of their own sweat unable to move while speaking some form of jibberish; and bigger kids will live submerged in a swimming pool for 3 months equipped with their own SCUBA gear and a feeder tube with smoothies running all day. 

But on this day the weather is AMAZING, again. Let us welcome springtime with a fun bird's nest dinner. My kids actually thought this was a real nest with a real egg and a real bird. I was pretending the bird was chirping and at one time even chirped loudly while thrusting the nest towards their nose. The little one screamed and ran away pretty darn fast (but don't worry she ran back laughing!) They were scared to touch it and, in the end, scared to eat it. I suggest bringing the theatrical part of it down a notch with the younger, more sensitive kiddos.

WHAT YOU NEED:


  • 1/2 BOX OF COOKED SPAGHETTI
  • 1 EGG
  • 2 TBS PARMESAN CHEESE
  • OLIVE OIL
  • MINI MOZZARELLA BALLS
  • MARINARA SAUCE


DIRECTIONS:

Preheat oven to 350 degrees.
Cook pasta based on directions on the box. Drain pasta and place back in pot.
Mix together the egg and parmesan cheese then pour it over the pasta and mix it in well.

[You could also add in cooked spinach to the pasta to get some extras veggies into your bird lovers.]

Generously grease a muffin tin with olive oil. Divide pasta evenly between the tins (it is about 1/2 cup.) Then twirl the pasta round a fork to get it in a nest like shape. Remove fork and using fingers make an indentation in the middle of the pasta. Drizzle the pasta with some olive oil.


Place in the oven for 10-12 minutes. Remove pasta and allow it to cool for 10 minutes; this helps the nests to hold together when you remove them from the muffin tin.

Once cooled, gently scoop out the nests and fill them with marinara sauce and a mozzarella ball.


Tweet! Tweet!

Tuesday, March 11, 2014

"Brobee" Chips or the Vegetable Formally Known as Kale


Since my oldest was only a few months old I started her on TV. Some may call me a bad parent but others will call me brilliant. Whichever way your beliefs go TV has given me hours of time to sit back, relax, and read a magazine. Yeah right! Rather it has provided me chances to cook dinner, clean, type this blog, take a shower.

We dove head first into Nick Jr. For a long time the only music I heard was from The Fresh Beat Band or Yo Gabba Gabba. I would (and still do) sing these songs all the time and even got excited when certain episodes came on (I still have my favorites. "Baby" from YGG for one.) We even dressed up as the Gabba gang for Halloween a few years ago. Isn't baby Muno adorable?!
Baby Muno
Sometimes it doesn't matter what you give your child to eat as long as you give it the right spin. And nothing needs a spin more than leafy greens! Telling your kid to try some tasty kale might not get you very far. But asking them if they want "Brobee" chips to go to the 'party in their tummy' might get positive results.

If you have no idea what I am talking about then:

1) you do not have a toddler;
2) you are a super parent and don't let your wee one watch tv;
3) you have an older child and have spent years trying to forget about the Yo Gabba Gabba gang.

In the cases of #1 and #2 I highly suggest getting online right now and watching some Yo Gabba Gabba videos. The first few episodes will seem pretty trippy to you but the music is fun and the characters will give you lots of fodder to discuss at your next play/real date. In the case of #3 just turn away now and run!

In honor of the little green man on 'Yo Gabba Gabba' I have renamed the infamous kale chip as 'Brobee' chips. My kids eat these by the handful.

(For us 'Brobee' chips make sense. You might need to think up your own name for this tasty (and very healthy) snack. Maybe "Mermaid' Kelp, Tinkerbell's Pixie Chips, Peter Pan Treats, or Tic Toc Croc-o-Bites.)


What you Need:
Kale Leaves (if you are foreign to kale it can be found in most supermarkets. It is green and not that scary.)
Olive Oil
Salt

Directions:

Preheat oven to 375 degrees.


After washing your kale leaves take a sharp knife and cut out the thick vein down the middle.


Cut the kale leaves in half (I used to cut them up in little pieces but they are easier to bake when they are big.) Toss them with a little bit of olive oil. Don't use so much oil that they are dripping and covered; just enough to lightly coat them. Spread them out in a single layer on a baking dish and sprinkle with salt.


Bake for 10 minutes. If the pieces are big enough flip them over after 5-6 minutes. You want them nice and crispy. If after 10 minutes they are still limp bake them for 1 minute increments. But be careful, if they turn brown they are burnt and will taste very bitter.

There have been a handful of times when I wasn't paying attention (ie crying kiddo, complete brain fart, too wrapped up in my role as Jake while playing pirates, etc...) and ruined my Brobee chips.

Enjoy!


FOOD PLAY!

In the spirit of St. Patricks' Day why not make some 4 leaf clovers and have fun with another green veggie (technically it is a fruit but who cares?!) 

All you need is a green bell pepper, green paint and some paper.

Cut the bell pepper in half and take out the seeds. Dip the halved peeper in some paint and get your shamrock groove on.


 It makes the perfect clover! Hope it brings you good luck!


Sunday, February 9, 2014

I Heart You!


I sometimes feel that I love my girls more than any mother has ever loved their baby in the entire history of the world (I am sure we have all felt like that, right?) With Valentine`s Day coming up there is no better time to let them feel the love that we have for them. 

V-day was always made special by my mother when I was growing up. She decorated the rarely used dining room with so many flowers, hearts, twinkly lights, and candies that you might have thought cupid threw up in there. It was beautiful! And we always had fondue for dinner that night. We each had our own color skewer and we would all clamor around the communal pot cooking our food. It was a fun way to bring us all together!  It is a tradition I will begin with my children when I can trust them around a boiling pot of oil! For now, I will decorate my own dining room in as much red and pink as possible and provide them with tasty treats, some love tokens and a few crafts. 

These `I heart you` treats, better known as palmiers, are full of yummy goodness. My oldest daughter ate 5 at once and wanted more (unfortunately for her I ate the rest!!!) Puff pastry is another wonderfully easy dough that you will find at your supermarket. Also, cardamon may not be a spice that you have stocked up in your pantry but I guarantee you that it is worth the purchase.


What You Need:

Puff Pastry Dough
2 TBS Butter, melted
1/4 cup Brown Sugar
1 TSP Cardamon
2 TBS Cinnamon


Directions:

Preheat oven at 450 degrees.

Defrost your store bought, pre-made puff pastry dough. Once defrosted, unroll the dough and spread on the butter.


In a small mixing bowl, mix together the brown sugar, cardamon and cinnamon. And then sprinkle it evenly on top of the buttered dough.


Now for the "tricky" part. In order to get the wonderful heart shape you will need to roll the dough in a particular way. Fold the sides of the square towards the center so that they go halfway to the middle. Then fold them again so that the two folds meet exactly in the middle. Then fold one half over the other half. Place in refrigerator for 20-30 minutes to harden up a bit.


Slice the dough into 1/4-inch slices and place them on a baking sheet lined with parchment paper. Place in the over for 5-6 minutes. Then using a spatula flip each cookie over and bake for another 4-5 minutes. Remove from oven and let them cool.


I served my treats with some red and pink and a little love note (she cannot read yet but she could feel the love for sure!)


FOOD PLAY:      

"I Heart You" Stamp

What you need:


  • Toilet Paper Roll
  • 2 small rubber bands
  • red paint
  • pink paint
  • whatever color paint


Directions:

Fold in the toiler paper roll to make a heart shape (see picture.) Use the rubber bands to hold your heart in place. Squeeze paint onto a plate to begin the stamping fun!


It is so easy an 18 month old can do it!


My love bugs 
 (and yes, that is paint on my wall!)


Friday, January 24, 2014

Bags of Gold


Sometimes thinking out of the box means thinking outside of that mac and cheese box. It is so easy to boil some water, toss in some hard pasta and then mix in some cheesy goodness. It is no wonder that it is a childhood staple! If you take a few more minutes you can create something beyond a bowl of mac and cheese. This is where these Bags of Gold come in. Please do not be freaked out by the phyllo dough. I repeat, DO NOT FREAK OUT! In your freezer section they have the premade dough which makes it is so simple and yet so fancy. It is fool proof! 


What you Need:


  • Box of Macaroni and Cheese
  • Thawed Phyllo Dough,4 sheets
  • 4 TBS Butter, melted
  • Cooking String


Directions:

Preheat oven to 400 degrees.
Bring a pot of water to boil and add in the uncooked macaroni. Cook according to the box's instructions. Drain and add in the cheese sauce and set aside.

Melt the butter. And get out a pastry brush (or a paper towel to dip in the butter.)

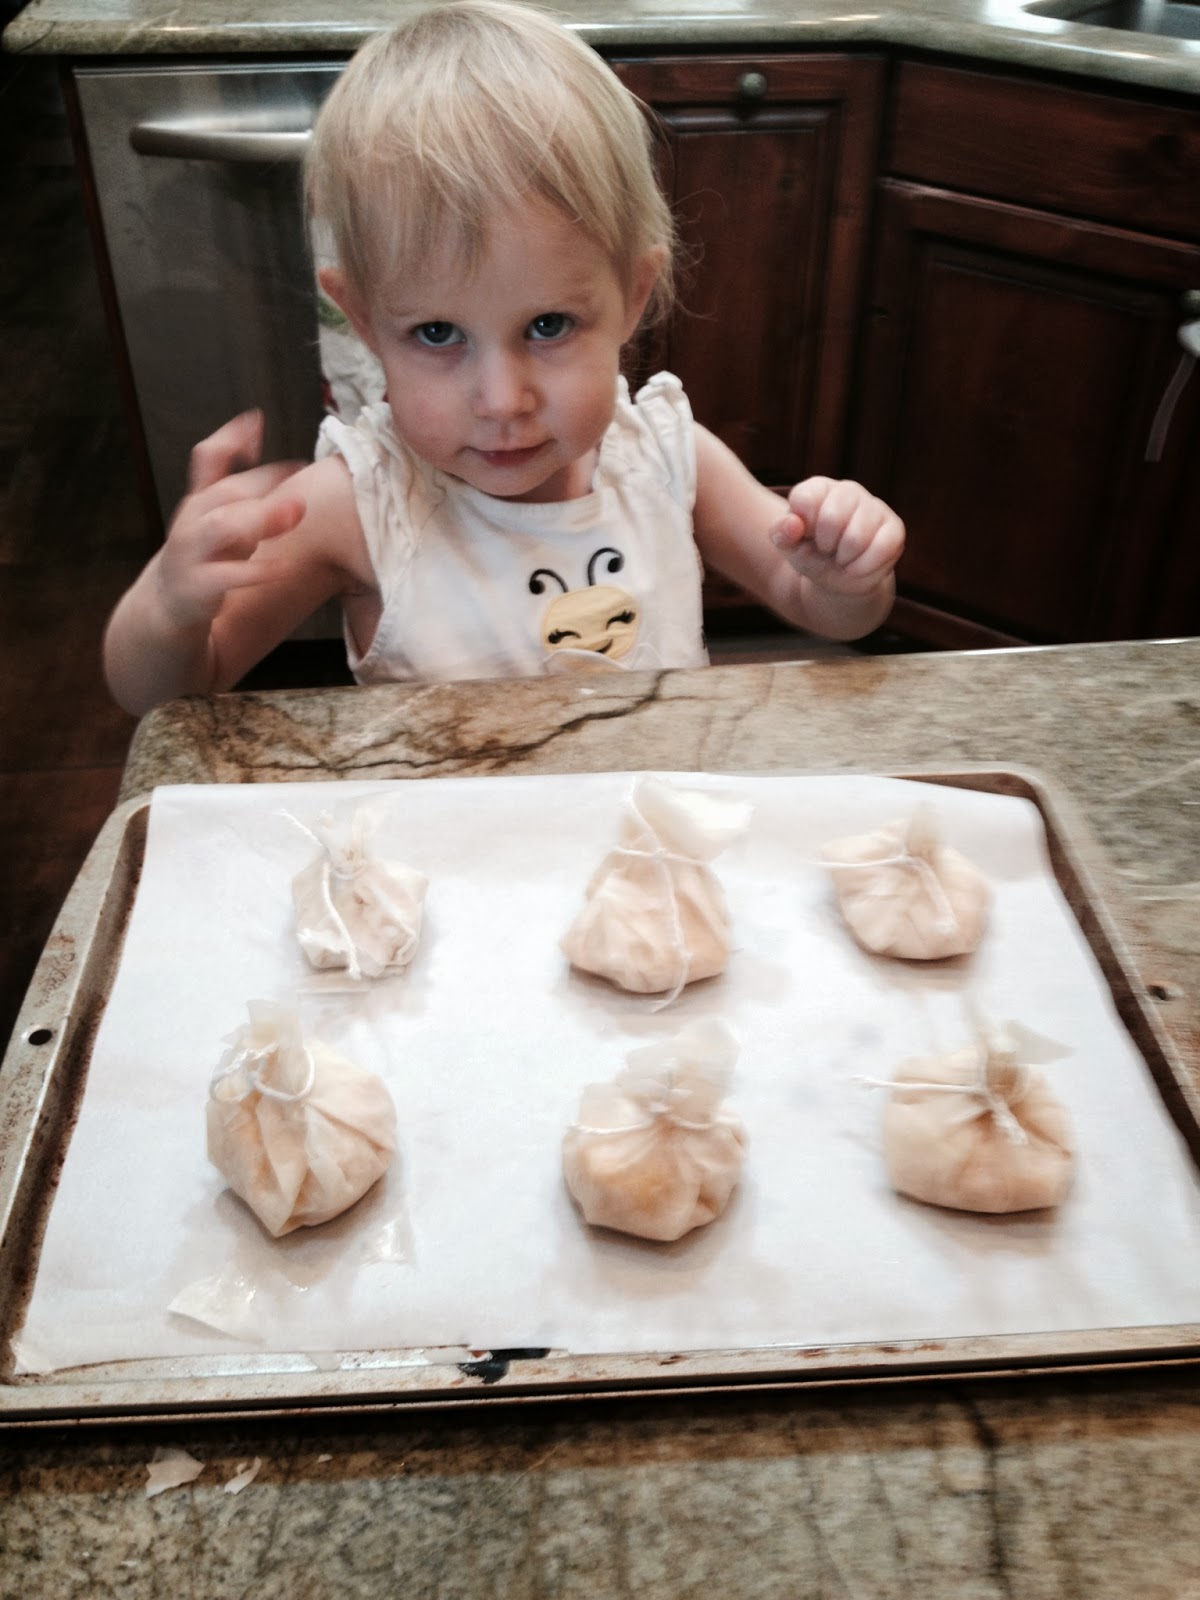
Open up the phyllo dough package. Take the first sheet out and place on counter and cover the rest of the dough with a damp cloth (it tends to dry out easily.) Brush the entire phyllo sheet with butter. Take the second phyllo sheet and place directly on top of the first. Brush that entire sheet with butter. Repeat with the next 2 sheets.

Cut the stack of sheets into 6 squares (ok, they are more rectangular shaped but you get the picture!)


 Now take about 2 TBS of the mac and cheese and lump it into the center of the squares.


Then gently fold up the sides of each square to cover the mac and cheese. Using the cooking string tie the tops together into a bag. It is so easy an 18 month old can do it!! Line them up on a baking sheet and pop them into the over for 10 minutes (or just until the tops get nice and brown.)


FOOD PLAY:

I know I should be have a craft idea here with lots of pictures of my little ones enjoying getting their hands a bit messy while they create their masterpiece. I keep delaying in posting this in order to have a craft idea orchestrated. Let's face it, its easy to get distracted as a mother. Heck, why organize a craft when I can be watching the next episode of Dexter on Netflix, right?! 

Don't worry, I am not going to leave you hanging here. I was going to do some sort of piggy bank craft (bags of gold = money bags = saving money.)  First I was thinking of getting a used plastic bottle and having the kiddos paint it like a piggy and put a slit on the side so they can start saving their pennies for college. Then I though that might be too much planning and work. So maybe just have the kiddos decorate a paper bag and then tie the top with a string leaving enough room to insert coins or that random $20.